Understanding Layer Height in 3D Printing
Layer height, sometimes referred to as resolution, is one of the most crucial settings in 3D printing. It refers to the thickness of each individual layer that your printer lays down as it builds your model. Adjusting this single setting can dramatically affect both the speed and the surface quality of your prints. As a seasoned 3D printing enthusiast, I’ve learned that mastering layer height is key to optimizing your prints for either speed or smoothness according to your project needs.
The Relationship Between Layer Height, Speed, and Surface Quality
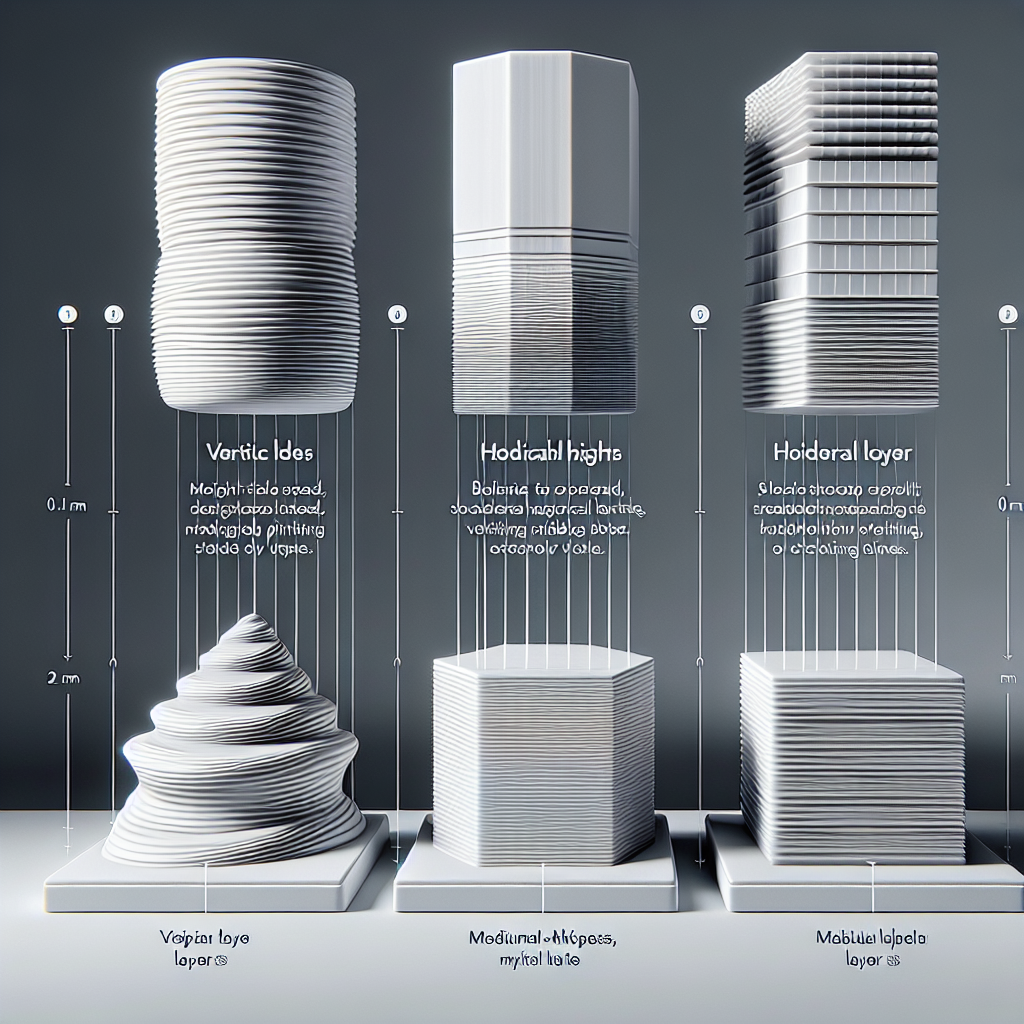
When you select a lower layer height (for example, 0.1mm), your printer will produce more layers to achieve the same overall object height, resulting in finer details and a smoother finish. Conversely, increasing layer height (such as 0.3mm) decreases the number of layers, which speeds up your print but can leave visible ridges on your object and reduce detail.
Faster Prints with Higher Layer Heights
For prototypes or functional parts where visual smoothness isn’t a priority, using a higher layer height is a smart way to save time. Here are some tips for using this approach effectively:
- Choose the Right Nozzle: Typically, your maximum layer height should not exceed 80% of your nozzle diameter. For a standard 0.4mm nozzle, stick to 0.32mm or less.
- Increase Layer Height in Slicer: In your slicer software, experiment with raising the layer height to 0.2mm or 0.3mm for faster builds.
- Monitor Overhangs and Bridging: Thicker layers can struggle with complex details, so ensure your model doesn’t require fine features if you plan to print fast.
- Use Draft or Vase Modes: Many slicers offer draft modes optimized for speed with higher layer heights and wider lines.
Smoother Prints with Lower Layer Heights
If you’re creating visual models, display pieces, or parts with intricate details, reducing the layer height can vastly improve the surface finish. Here’s how to get the most out of fine layer heights:
- Set Layer Height to 0.12mm or Lower: Most printers can handle 0.12mm or 0.1mm, and some can even go as fine as 0.05mm.
- Check Printer Calibration: Fine layers reveal any misalignments or vibrations, so make sure your printer is properly calibrated and on a stable surface.
- Use High-Quality Filament: Lower layer heights are less forgiving of poor-quality filament, so invest in reliable brands.
- Adjust Print Speed: Print slower to avoid missing steps or under-extrusion issues at low layer heights.
Finding the Sweet Spot: Balancing Speed and Quality
Not every print requires the slowest, finest layers. For many functional projects, a medium layer height (such as 0.16mm or 0.2mm) offers a good compromise between print speed and adequate surface finish. Consider your end use: functional parts or prototypes can benefit from faster settings, while highly visible or detailed objects deserve more time and finer layers.
How Layer Height Affects Strength and Adhesion
It’s important to remember that layer height also influences part strength and adhesion. Thicker layers provide more surface area for the next layer to bond to, sometimes improving layer adhesion. However, extremely thick layers can reduce overall strength if they cool too quickly or deform. For strong, functional parts, test different heights and orientations to find the best result for your application.
Advanced Tips for Layer Height Optimization
- Variable Layer Heights: Some slicers offer adaptive layer height, where the layer height changes depending on model complexity. Use this for detailed tops and fast, thick layers on simple sections.
- Combine with Other Settings: Layer height works with line width, temperature, and print speed. Don’t be afraid to experiment with these for your ideal print.
- Post-Processing: If you print at high layer heights but want a smooth finish, consider sanding, vapor smoothing (for ABS), or using a filler primer.
Conclusion
Layer height is more than just a number in your slicer; it’s a powerful tool for controlling the balance between speed, detail, and strength in your 3D prints. By understanding how it interacts with other print settings and your model’s requirements, you can produce faster prototypes or stunningly smooth display pieces with confidence. Remember – the “best” layer height depends on your goals, so don’t hesitate to experiment and review your results. Happy printing!
Leave a Reply