Understanding the Importance of Print Cooling for Overhangs
When it comes to 3D printing, achieving clean and precise overhangs is a common challenge, especially with FDM (Fused Deposition Modeling) printers. Overhangs are portions of a print that extend outward without direct support underneath. If not cooled correctly, these sections can sag, warp, or print with poor definition. Print cooling is crucial, as it solidifies the extruded filament quickly enough to support subsequent layers. In this article, we’ll dive into proven strategies and expert tips to optimize print cooling and achieve superior overhangs.
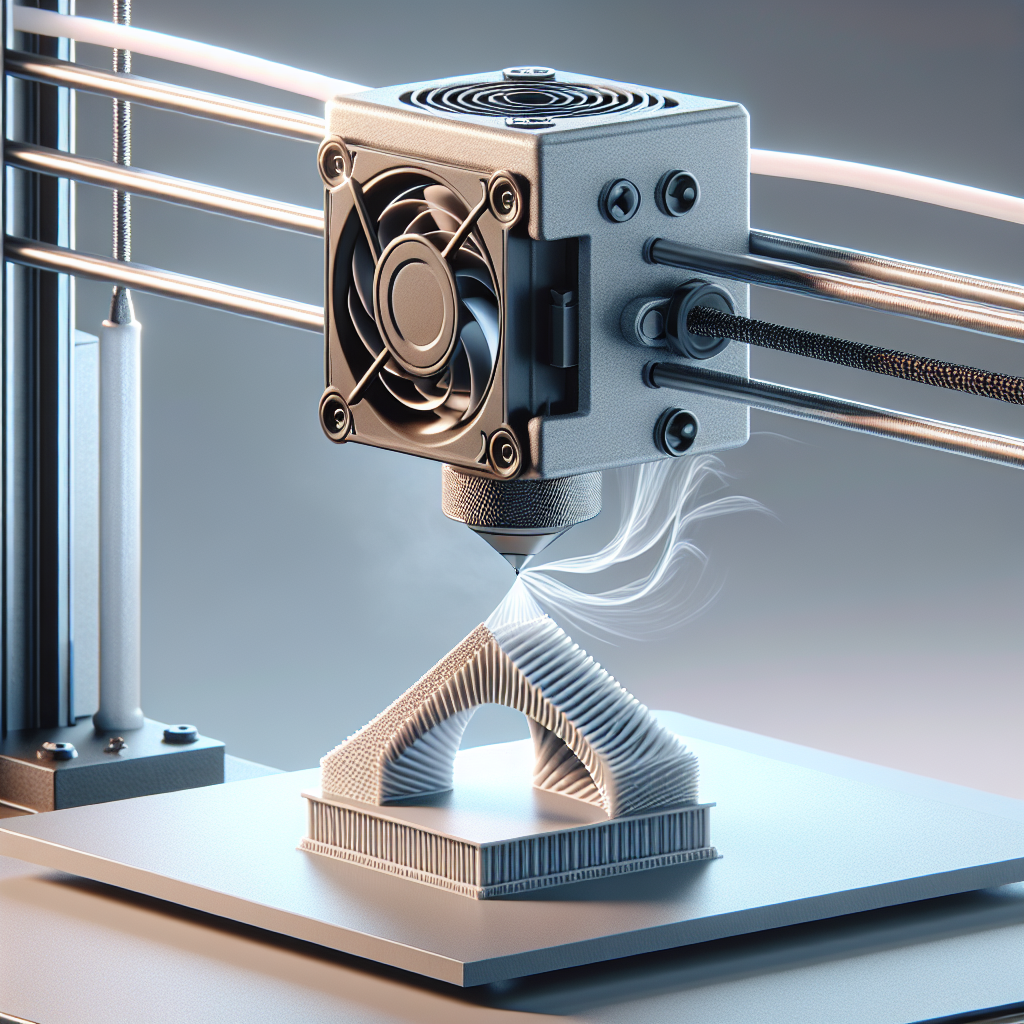
Optimize Your Cooling Fan Setup
The most direct way to improve print cooling is by enhancing your printer’s cooling system. Most hobbyist 3D printers use a part cooling fan that directs air onto the freshly extruded filament. Consider the following:
- Upgrade to a More Powerful Fan: Some stock fans are underpowered. Upgrading to a higher CFM fan can improve airflow significantly, solidifying layers faster.
- Use a Duct or Shroud: 3D printed fan ducts or shrouds can focus airflow right onto the print, ensuring even cooling across overhangs and bridges.
- Dual Fans: Installing a second fan on the opposite side of the printhead can eliminate dead zones and improve cooling uniformity.
Adjust Print Cooling Settings in Your Slicer
Slicer settings play a pivotal role in cooling efficiency. Here’s what to look for:
- Fan Speed: For PLA, set fan speed to 100% after the first few layers. For materials like ABS, reduce or turn off the fan to prevent warping.
- Layer Time: Enable minimum layer time to slow down printing of small layers, allowing each to cool adequately before the next is deposited.
- Bridging and Overhang Settings: Many slicers allow specific settings for bridges and overhangs, such as increasing fan speed or slowing print speed during these sections.
Optimize Print Orientation and Design
Sometimes, a simple change in orientation can dramatically improve overhang quality:
- Reduce Overhang Angle: Overhangs exceeding 45° are inherently challenging. Orient your model to minimize steep, unsupported angles.
- Use Supports Strategically: Enable supports only where necessary to reduce print time and material use, but don’t hesitate to use them for extreme overhangs.
- Design for Printing: Consider adding chamfers or fillets in your CAD model to reduce overhangs and make them more printable.
Material Matters: Choose the Right Filament
Different filaments respond uniquely to cooling:
- PLA: Cools and solidifies quickly, making it the best choice for challenging overhangs.
- PETG: Needs moderate cooling; too much can cause poor layer adhesion or stringing.
- ABS: Avoid strong cooling to prevent warping, but add gentle airflow if necessary for minor overhangs.
Always match your cooling strategy to the material in use to ensure optimal results.
Calibrate Print Speed and Temperature
Higher print speeds mean less time for each layer to cool, which can be detrimental for overhangs. To counteract this:
- Slow Down: Reduce print speed when approaching overhangs or enable your slicer’s “slow down for small layers” feature.
- Lower Extrusion Temperature: Printing at the lower end of your material’s temperature range can help filament solidify faster, but test to ensure proper layer adhesion.
Advanced Tips and Troubleshooting
If you’re still struggling with overhangs after optimizing cooling, try the following:
- Add “Sacrificial Towers” or “Cooling Towers”: Printing a secondary object alongside your model can give layers more time to cool.
- Use External Cooling: A desktop fan pointed at the print area can supplement onboard cooling, especially for large overhangs.
- Check Airflow Obstructions: Ensure nothing (like wires or enclosure walls) blocks the fan output.
Conclusion
Mastering print cooling is essential for crisp, clean overhangs and overall print quality. By upgrading your cooling hardware, fine-tuning slicer settings, choosing the right filament, and adjusting print orientation, you’ll notice an immediate improvement in challenging prints. With a bit of experimentation and these expert tips, even complex overhangs will come out sharp and sag-free. Happy printing!
Leave a Reply