
Why 3D Printing is Perfect for PC Case Mods
When it comes to personalizing your PC case, 3D printing stands out as an unparalleled tool for creators and enthusiasts. Traditional modding techniques often require specialized tools, materials, and skills. In contrast, 3D printing empowers you to design, prototype, and install unique parts with precision and repeatability. Whether you’re aiming for better airflow, aesthetic enhancements, or functional components, 3D printing opens a world of possibilities for DIY PC case modding.
Planning Your 3D Printed PC Mod
The first step is always planning. Assess your PC case and identify what you want to modify or improve—be it cable management clips, custom fan grills, GPU brackets, or intricate RGB mounts. Measure the dimensions of the components and space available in your case. Use digital calipers for accurate measurements; this will save you headaches during the design and installation phases.
Tools and Software
1. 3D Modeling Software: Free options like TinkerCAD, Fusion 360, or Blender are user-friendly for beginners and powerful for advanced users.
2. Slicer Software: Cura, PrusaSlicer, or similar will convert your models into printer-ready formats (G-code).
3. 3D Printer: FDM printers (like Prusa, Creality, or Anycubic) are widely used; for finer details, consider SLA resin printers.
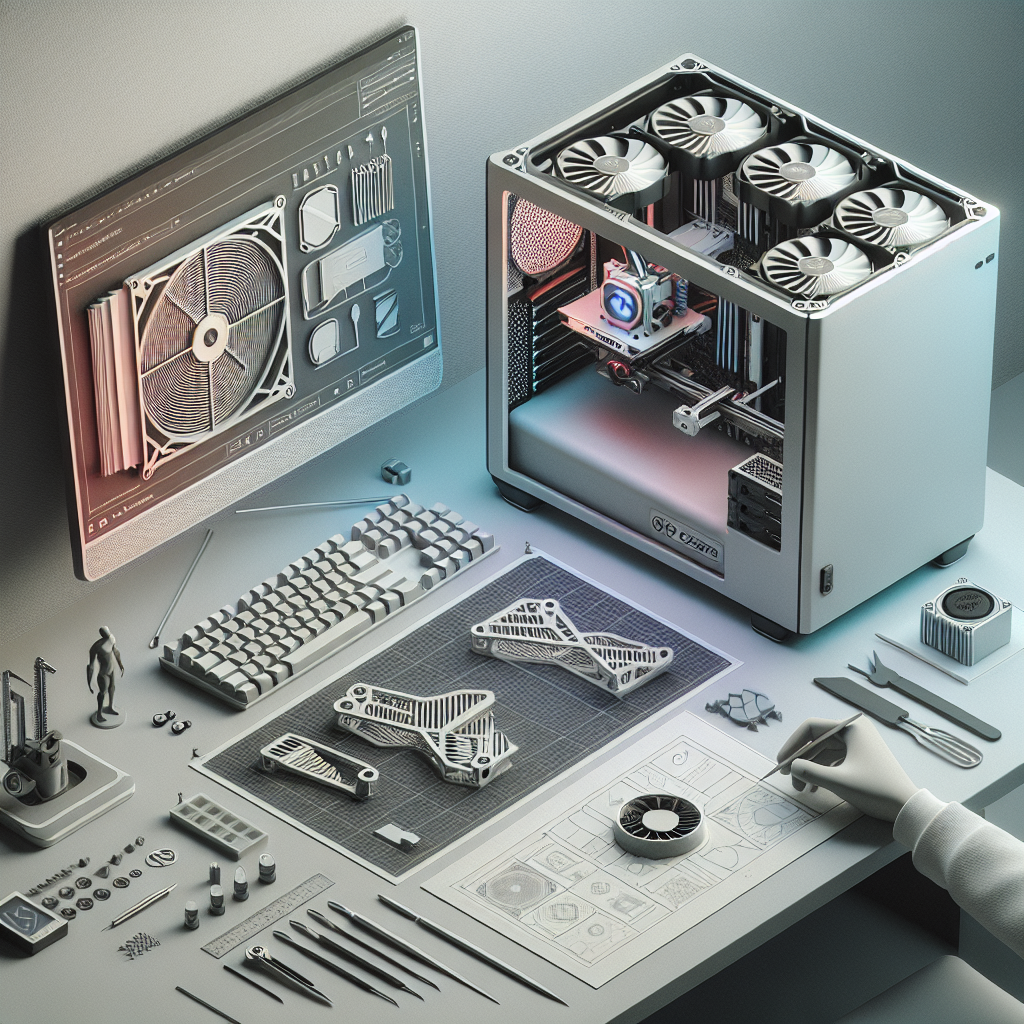
Designing Your Custom PC Mods
Start simple. Sketch your idea on paper or digitally. For complex parts, model each component separately before assembling them virtually to check fit and function. Remember to leave tolerances—typically 0.2 to 0.5mm—for parts that need to snap together or fit over existing components.
Popular 3D Printed PC Mod Ideas
- Custom Fan Grills with gamer logos or geometric patterns
- SSD/HDD Mounts and brackets
- Cable Combs for tidier cable management
- PCIe GPU supports to prevent sag
- Front I/O panel covers or replacements
- Reservoir mounts for custom water cooling loops
- LED and RGB light diffusers
Selecting the Right Filament
For most mods, PLA is a great starting point—easy to print and available in many colors. For parts exposed to high temperatures (near GPUs, CPUs, or radiators), PETG or ABS are better choices due to their heat resistance. Flexible filaments like TPU are excellent for vibration-dampening mounts or gaskets.
Printing and Post-Processing
After slicing your model, double-check layer height, infill, and support settings for optimal strength and finish. Print prototypes in draft mode to save time and material, and test fit before committing to high-quality prints.
For a professional finish:
- Sand rough edges with fine-grit sandpaper
- Use filler primer spray for smoothness, then paint for a custom look
- For translucent effects, use transparent filaments and polish with fine sandpaper or plastic polish
Installation and Finishing Touches
Ensure your printed mods fit snugly and securely. Use double-sided tape, screws, or zip ties if necessary—design your parts with mounting in mind. Test your PC’s airflow and temperatures after installing new mods, especially if you’ve added grills or panels that could restrict airflow.
For added flair, integrate addressable RGB LEDs into your prints or layer multiple colors of filament for unique effects.
Sharing and Iterating Your Designs
After a successful mod, consider sharing your STL files and build process with the community on sites like Thingiverse, Printables, or Reddit’s /r/pcmods. Feedback from other modders can help you refine your designs.
Conclusion
3D printing PC case mods empowers any DIYer to take their build to the next level. With a little planning, the right materials, and a dash of creativity, you can turn your case into a true showpiece—functionally and aesthetically. Whether you’re printing cable combs or custom front panels, the only limit is your imagination. Happy modding!
Leave a Reply