
Understanding Overhangs and Bridges in 3D Printing
In 3D printing, overhangs and bridges can pose significant challenges, especially when printing without support structures. Overhangs are areas of a print where a layer extends outward beyond the previous layer’s support, while bridges are horizontal sections that span two points without direct support beneath. Printing these challenging areas successfully without supports not only saves material and time but also provides a cleaner, more professional-looking final print.
Why Avoid Printing Supports?
Supports often serve as a necessary evil in 3D printing. While they help create stable structures for overhangs and bridges, they also generate extra print time, wasted filament, and leave rough surfaces upon removal. Thus, mastering how to print successfully without supports can significantly enhance the overall quality and efficiency of your prints.
Design Considerations for Overhangs and Bridges
The ability to print overhangs and bridges without supports begins with smart design choices:
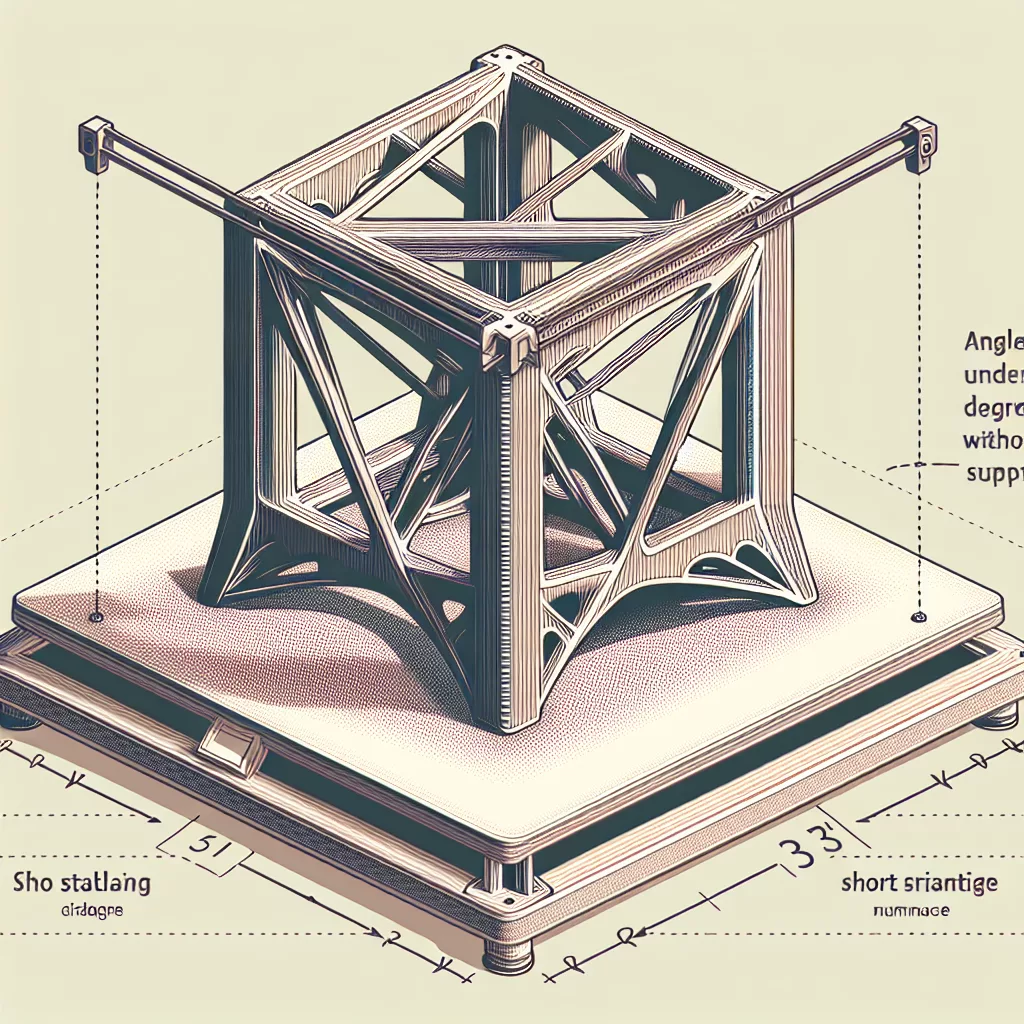
- Limit Angles: Keep overhang angles below 45 degrees whenever possible, as most FDM printers can handle angles up to this point without difficulty.
- Bridge Distance: Design bridges short enough to be manageable by your printer. Shorter bridges are easier to print neatly without sagging.
- Chamfers and Fillets: Add chamfers or fillets to edges and corners to reduce the severity of overhang angles, making them easier to print cleanly.
Optimal Printer Settings for Successful Overhangs and Bridges
Adjusting your printer’s settings is crucial for achieving successful prints without supports. Here are some key areas to consider:
Temperature and Cooling
A proper balance between extrusion temperature and cooling is critical. Lowering nozzle temperature slightly can improve bridge and overhang quality by causing the filament to solidify faster upon extrusion. Additionally, increasing fan settings or adding a dedicated cooling fan can greatly enhance bridging results by quickly solidifying filament strands, minimizing drooping.
Print Speed and Flow Rate
Slowing down your printer during bridge sections allows filament to cool and solidify before sagging occurs. Aim for slower speeds in bridging sections—about 50% of your typical printing speed—to achieve better results. Adjust your flow rate or extrusion multiplier slightly downward during bridging to help prevent excessive filament drooping.
Layer Height
Decreasing layer height can enhance overhang performance as thinner layers solidify faster and provide better structural integrity for unsupported sections. Layers between 0.1mm and 0.2mm usually strike a good balance between print quality and speed.
Tuning and Calibration for Improved Results
To get the best results, consider performing calibration tests specifically designed to optimize bridging and overhang performance. Popular calibration models—such as overhang angle tests and bridging test prints—can help you fine-tune your printer settings by identifying areas that need adjustment.
Orientation and Positioning on the Print Bed
The orientation of your model on the print bed significantly impacts overhang and bridging quality:
- Minimize Overhangs: Rotate or reposition models on the bed to minimize severe overhang angles.
- Bridge Direction: Orient bridges to run parallel to the printer’s cooling fan airflow, maximizing effective cooling and improving bridging quality.
Material Choices for Easier Printing
Selecting the right filament material can also help in successfully printing overhangs and bridges without supports:
- PLA: One of the easiest materials to print without supports due to its lower extrusion temperature and excellent cooling response.
- PETG: Slightly more challenging than PLA, but with careful tuning, PETG can produce impressive bridging and overhang results.
- ABS: Generally more difficult for fine bridging due to higher temperature and slower solidification, but success is achievable with optimal printer settings and robust cooling.
Using Slicer Software Features to Enhance Results
Modern slicers offer powerful features specifically aimed at improving bridging and overhang performance:
- Bridging Settings: Use specialized bridging settings in your slicer software, such as lower speed and reduced extrusion multiplier, to achieve cleaner, sag-free bridging.
- Adaptive Layer Heights: Employ adaptive layer heights to automatically reduce layer thickness in challenging areas, improving structural integrity and print quality.
- Perimeter and Infill Adjustments: Adjusting perimeter parameters or using denser infill near overhangs can provide better underlying support to unsupported areas.
Practice Makes Perfect
Mastering the art of printing overhangs and bridges without supports requires experimentation, patience, and practice. Start with benchmark prints and iteratively adjust your parameters, orientation, and designs. Over time, you’ll develop a deep understanding of your printer and settings, becoming adept at effortlessly creating clean, support-free prints.
By following these guidelines, adopting smart design practices, fine-tuning printer settings, and leveraging slicer software capabilities, you will significantly enhance your skillset and achieve professional-quality prints without relying on supports.
Leave a Reply